Στο DIY ακολούθησα τις οδηγίες της Mazdaspeed. Το μεγαλύτερο ζόρι είναι το λύσιμο της μαμά εισαγωγής και του προφυλακτήρα, και εκεί επικεντρώθηκα φωτογραφικά.
Λύσιμο stock εισαγωγής και αφαίρεση προφυλακτήρα
1. Remove both front wheels from the car.
Δεν το έκανα, και μετάνοιωσα πικρά.  Σηκώνοντας το αμάξι και βγάζοντας τους τροχούς η δουλειά απλοποιείται δραματικά.
2. Unclip the hard plastic breather hose from the breather nipple by squeezing the blue retaining clip.
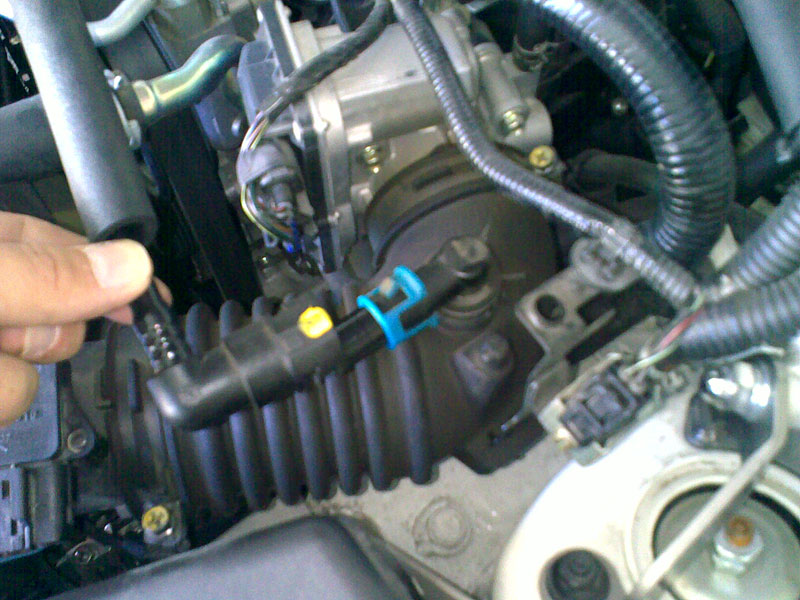
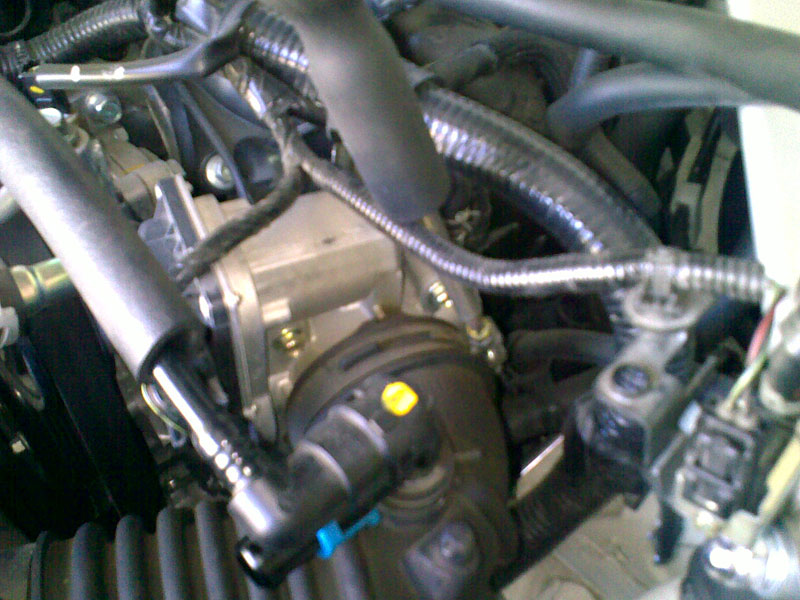
3. Lift up and remove the steel bracket securing the purge solenoid valve (PSV) to the inlet hose. Leave the PSV attached to the valve and move it out of the way.
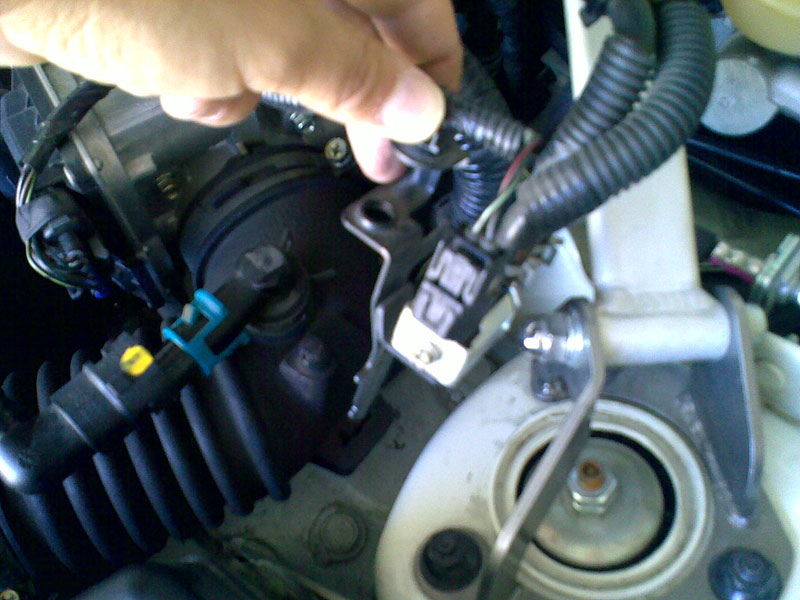
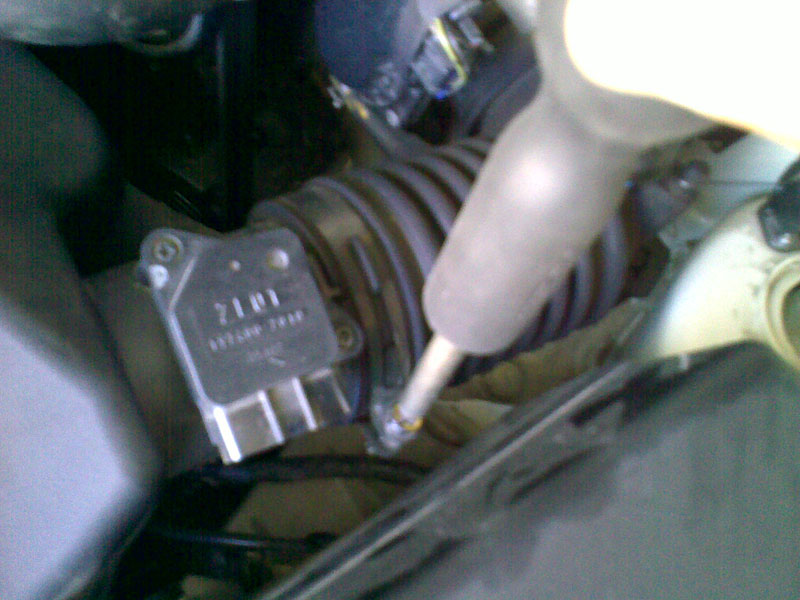
4. Unplug the MAF sensor from the wiring harness.
5. Unclip the MAF sensor wiring harness from the side of the air filter housing
6. Loosen the hose clamps securing the inlet hose to the throttle body and the air filter housing. Remove the inlet tube.
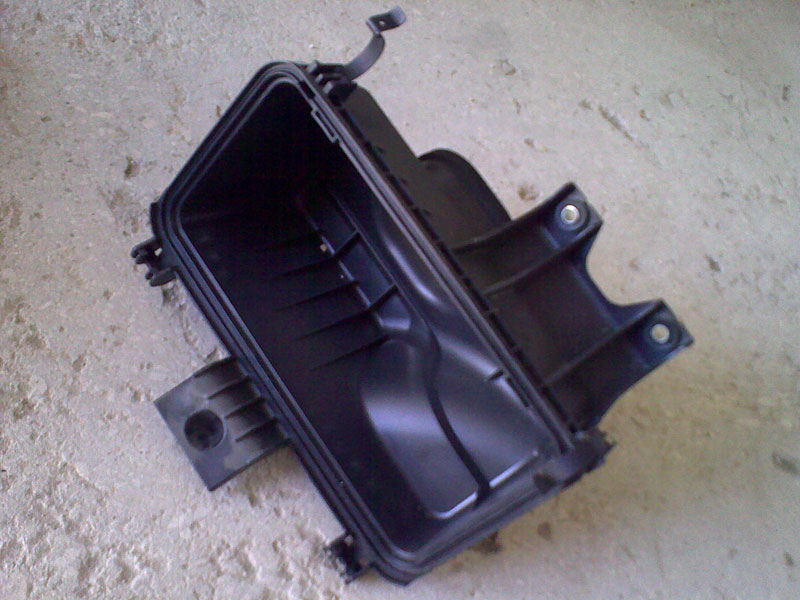
7. Remove the air filter housing lid by unhooking the metal retaining clips and sliding the lid out.
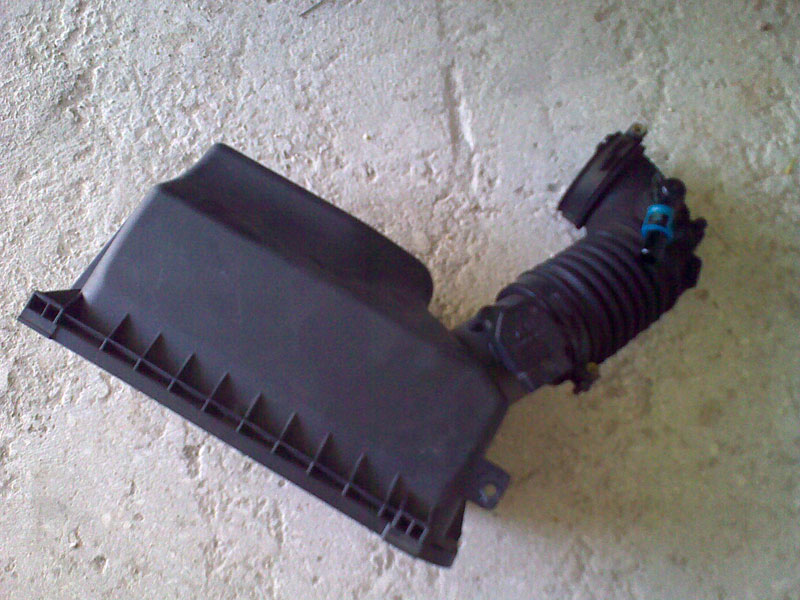
8. Remove the air filter element
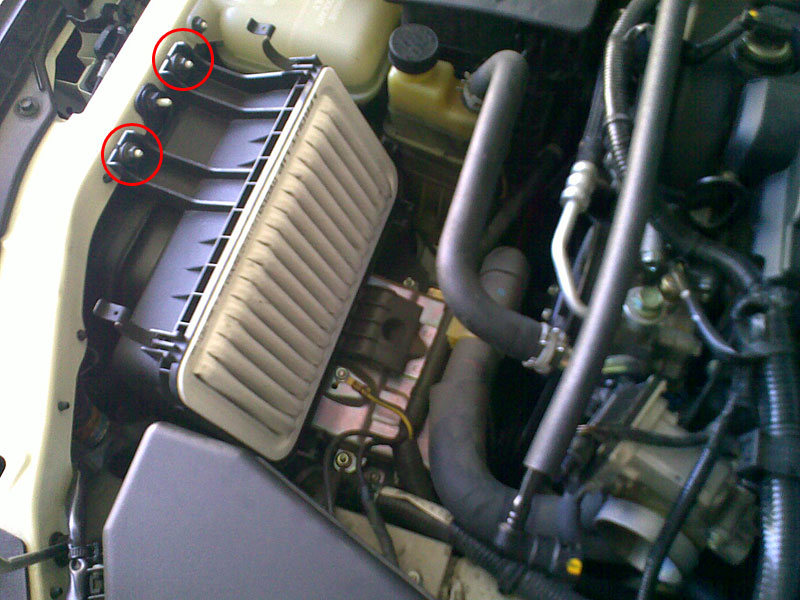
9. Remove the lower air filter housing by removing the two nuts securing the housing to the chassis. Next, lift up on the back side of the housing and remove it from the vehicle.
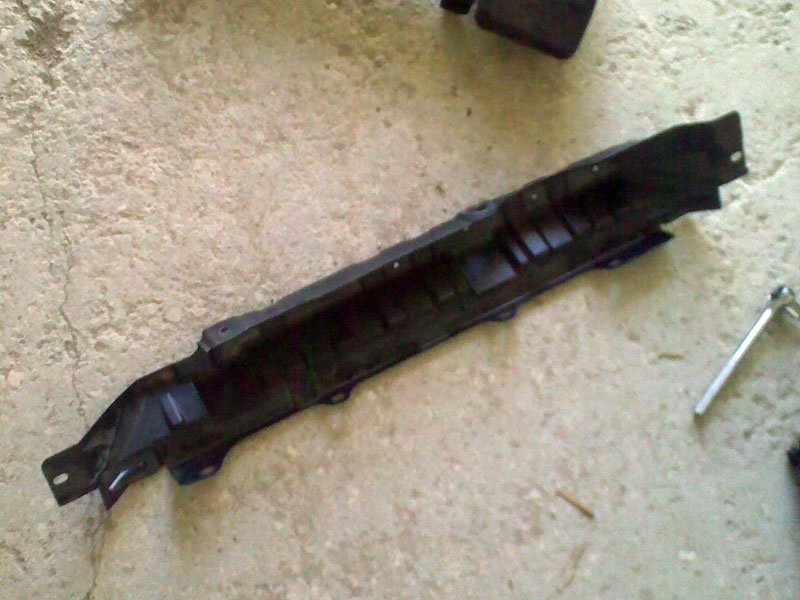
10. Remove the retaining clips and bolts securing the driver and passenger side splash shields to the bumper and chassis. Remove the splash shields.
Δεν έβγαλα φωτογραφίες γιατί ήμουν μόνος μου, αλλά αυτά τα δύο σχεδιαγράμματα βοήθησαν πολύ.

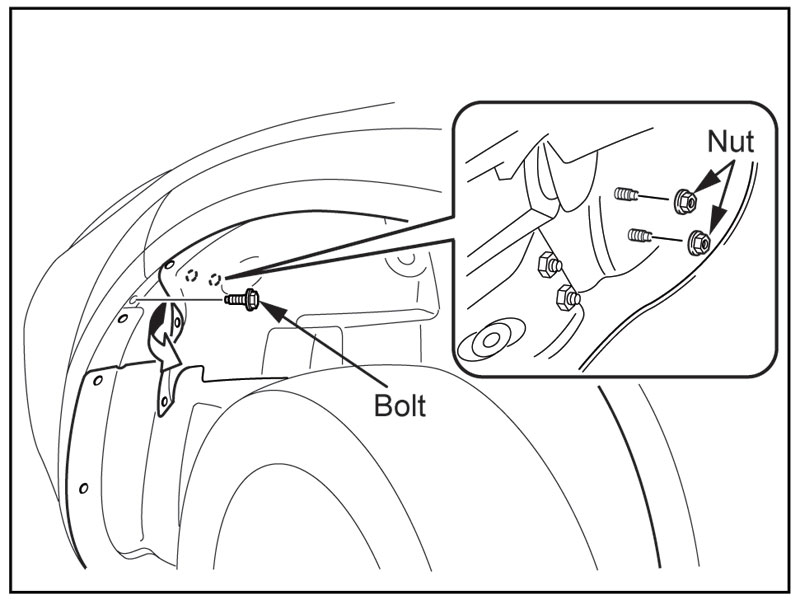
Επίσης δεν αφαίρεσα τα splash shields, απλά τα παραμέρισα για να αποκτήσω πρόσβαση στη βίδα και τα δύο παξιμάδια που είναι κρυμμένα από πίσω.
11. Disconnect the front fog light connectors for vehicles equipped with fog lights.
Εγώ το έκανα αφότου ξεκούμπωσα τον προφυλακτήρα. Επίσης για τους κατόχους που έχουν Xenon, για να βγεί εντελώς ο προφυλακτήρας πρέπει να αποσυνδεθεί το σύστημα πλύσης των φαναριών. Εγώ δεν το έκανα και απλά άφησα τον προφυλακτήρα μπροστά από το αυτοκίνητο με τα πιτσιλιστήρια συνδεδεμένα.
12. Disconnect the side marker light connectors.
Δεν έχουμε εμείς τέτοια, αυτά είναι Αμερικανιές. 
13. Remove the parts in the order indicated in Table A
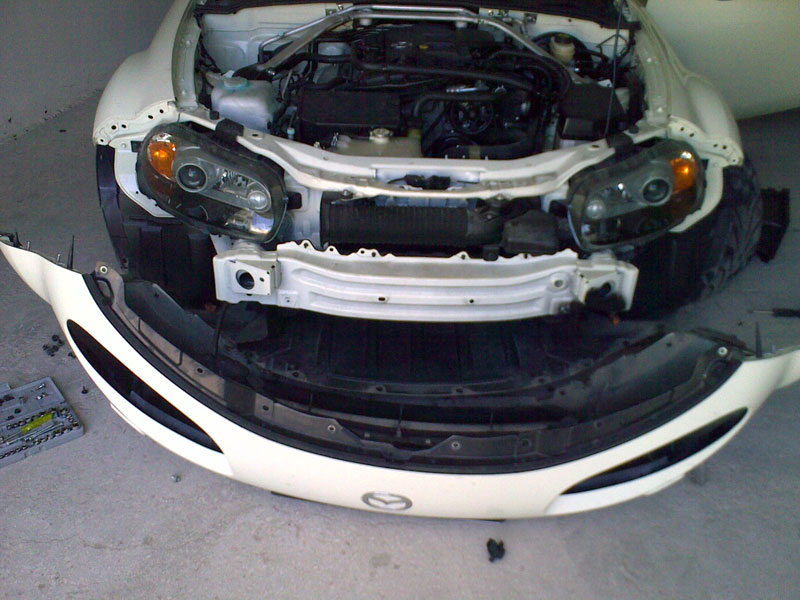
Έφτασε λοιπόν η ώρα να βγάλουμε τον προφυλακτήρα. Αυτά που γράφονται ότι και καλά βγαίνει σε 5 λεπτά είναι παπαριές. Αν έχεις σηκώσει το αμάξι, έχεις βγάλει τροχούς και έχεις και βοήθεια, τότε μπορεί να τον βγάλεις σε 5 λεπτά δουλεύοντας με ταχύτατους ρυθμούς. Με νορμάλ ρυθμούς το θέλει το τεταρτάκι του. Και αν το κάνεις όπως εγώ πρώτη φορά, με το αυτοκίνητο στο έδαφος, τότε κλάφτα Χαράλαμπε. 
Ακολουθούμε λοιπόν αυτά που γράφουν οι οδηγίες, και αυτό το σχεδιάγραμμα:
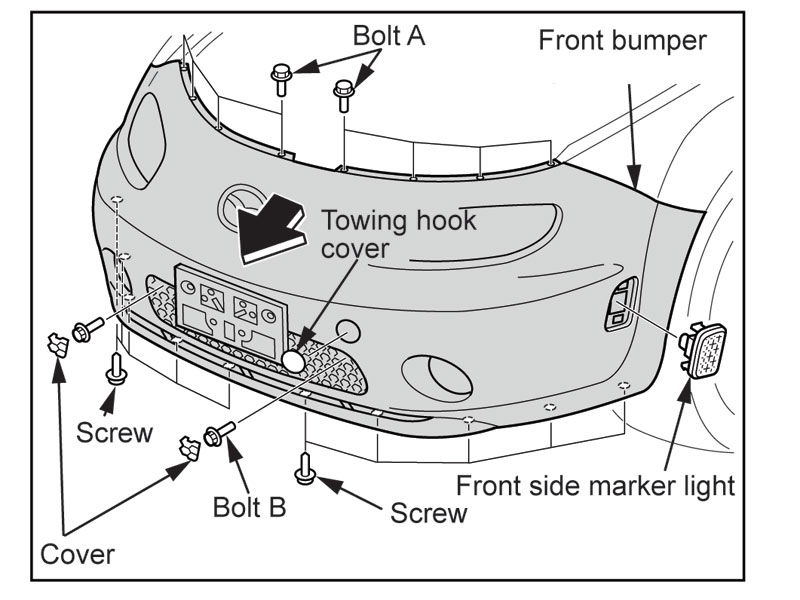
Έχουμε λοιπόν 8 βίδες επάνω, 2 κρυμμένες βίδες πίσω από δύο μικρά “πορτάκια” στη γρίλια και 10 βίδες από κάτω στο σπόιλερ. Μαζί λοιπόν με τα 4 παξιμάδια και τις δύο βίδες που βγάλαμε στο βήμα 10, μιλάμε για 20 βίδες και 4 παξιμάδια. Κατά τ’άλλα βγαίνει σε 5 λεπτά… 
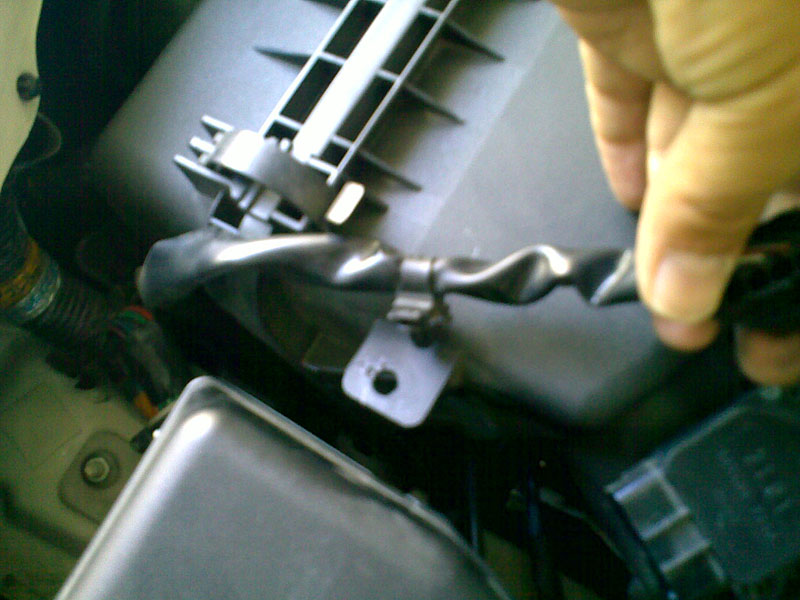
14. Remove the fresh air duct by removing the two plastic clips and the bolt securing it to the chassis
15. Remove the plastic fasteners securing the plastic shroud seal plate between the steel bumper support and the chassis.
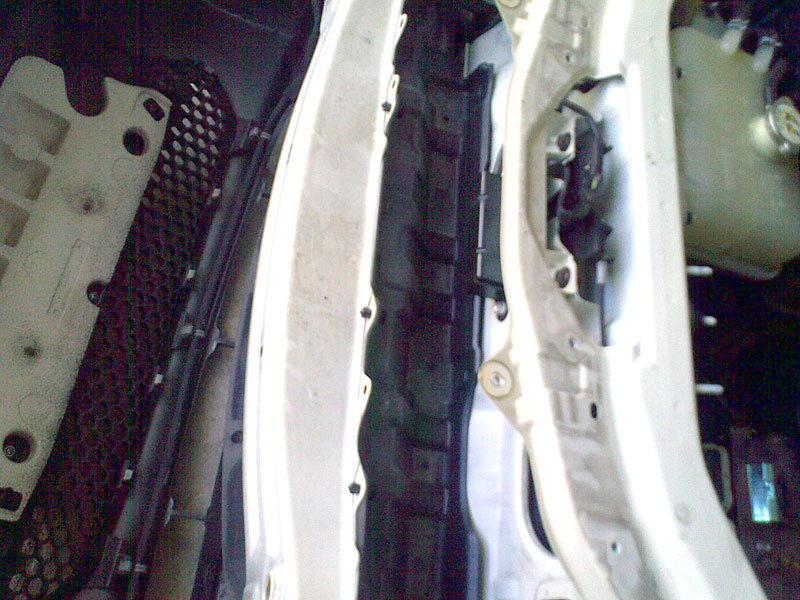
Εγώ έβγαλα όλα τα πλαστικά κλιπσάκια, και το έβγαλα κατευθείαν αυτό το πλαστικό (shroud seal plate) γιατί παρέλειψα το βήμα 17. Το πρόβλημα που δημιουργείται είναι ότι τα δύο κλιπσάκια που είναι κάτω από τα φανάρια δεν προσεγγίζονται χωρίς να βγάλεις το bumper support. Οπότε απλά τα σπας χωρίς πρόβλημα.
16. Unhook the wiring harness from the horn and unclip it from the bumper support.
17. Remove the 8 bolts securing the bumper support to the chassis. Remove the bumper support.
Δεν χρειάζεται να γίνει, ούτε το ένα ούτε το άλλο. Η σωλήνα περνάει και χωρίς να βγάλεις το bumper support. Απλά υπάρχει το μικρό προβληματάκι στο βήμα 15.
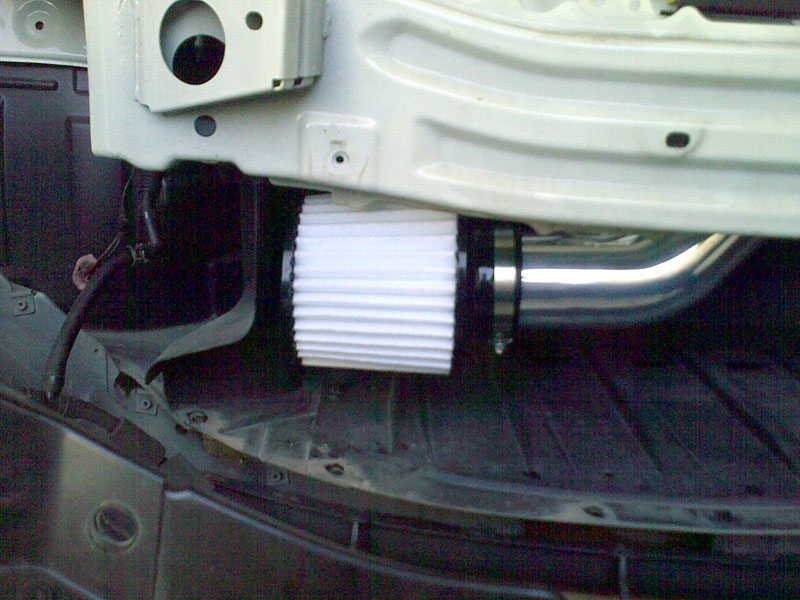
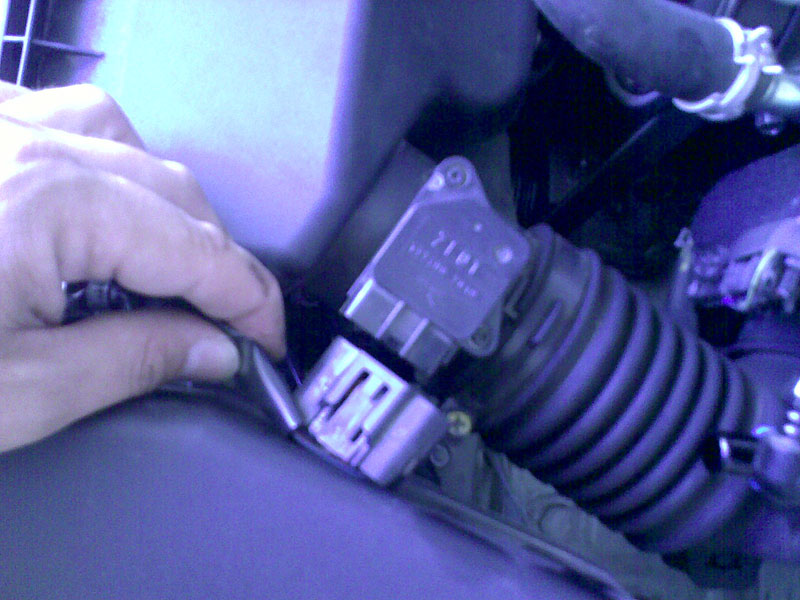
18. Remove the stock MAF sensor from the air filter housing lid
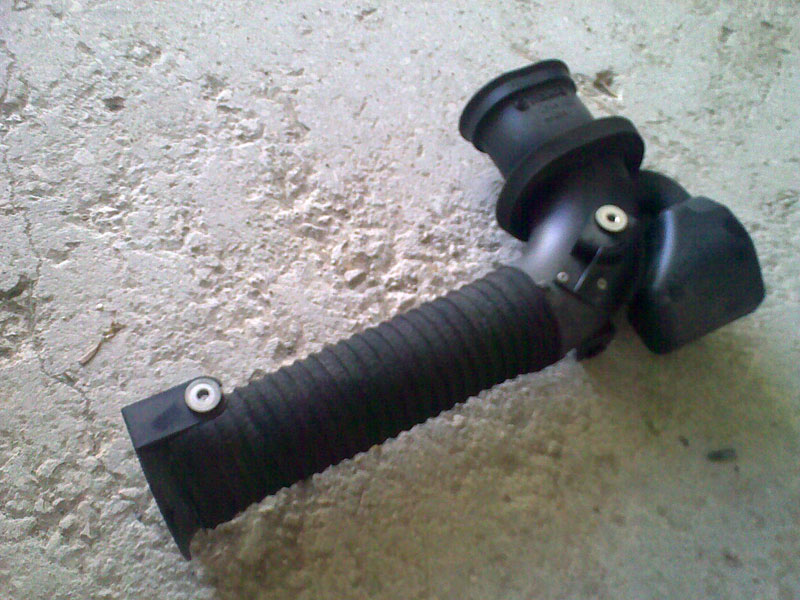
19. Remove the plastic breather nipple, spring clamp, and two hose clamps from the stock inlet hose.
Αυτά θα τα ξαναχρειαστούμε παρακάτω στην εγκατάσταση.
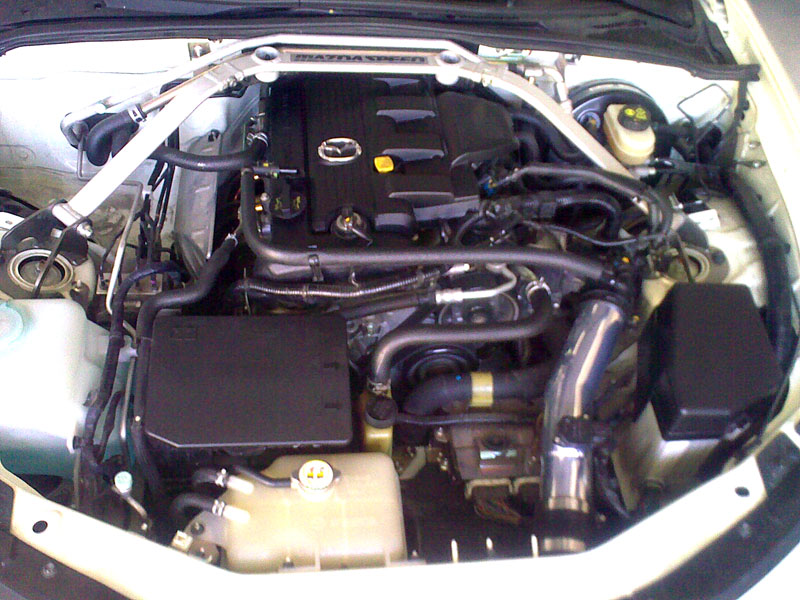
Εγκατάσταση Mazdaspeed CAI
Η εγκατάσταση είναι πολύ απλή ακολουθώντας τις οδηγίες. Γι’αυτό και δεν ασχολήθηκα να βγάλω φωτογραφίες. Απλά χρειάζεται λίγο προσοχή στα παρακάτω στάδια:
5. Install the MAF sensor into the upper intake pipe and secure using the two supplied 8-32 bolts. Torque the bolts to 12-15 in-lbs.
Άμα βρείτε αλενάκι 3.5mm σφυρίξτε μου κλέφτικα! Έφαγα τον κόσμο και δεν βρήκα. Οπότε αυτές οι δύο βίδες σφίχτηκαν όπως-όπως.
6. Install the upper pipe into the throttle body coupler on the throttle body using the stock hose clamp. Do not tighten. NOTE: MAF sensor position forward of elbow when in position.
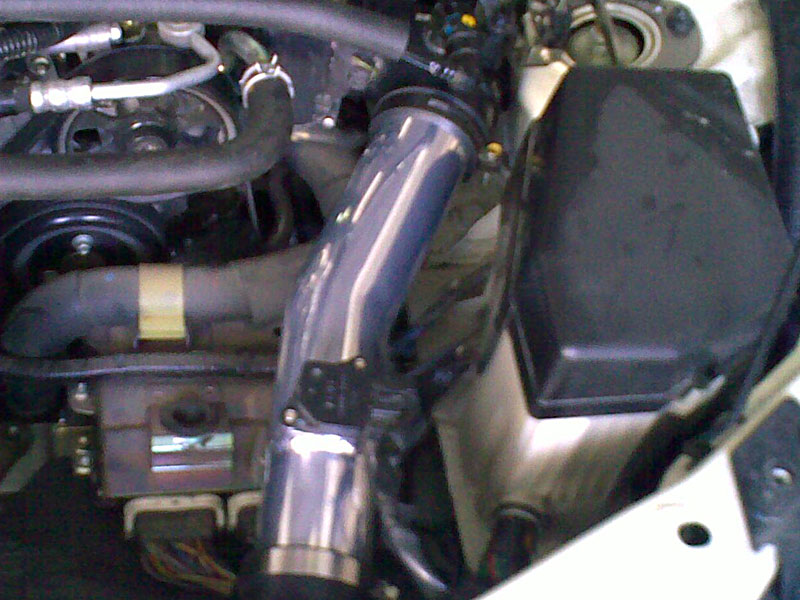
Προσοχή μην βάλετε ανάποδα την σωλήνα (και άρα και τον MAF sensor). Εγώ την είχα ψυλλιαστεί από το πάθημα άλλου, οπότε δεν την πάτησα.
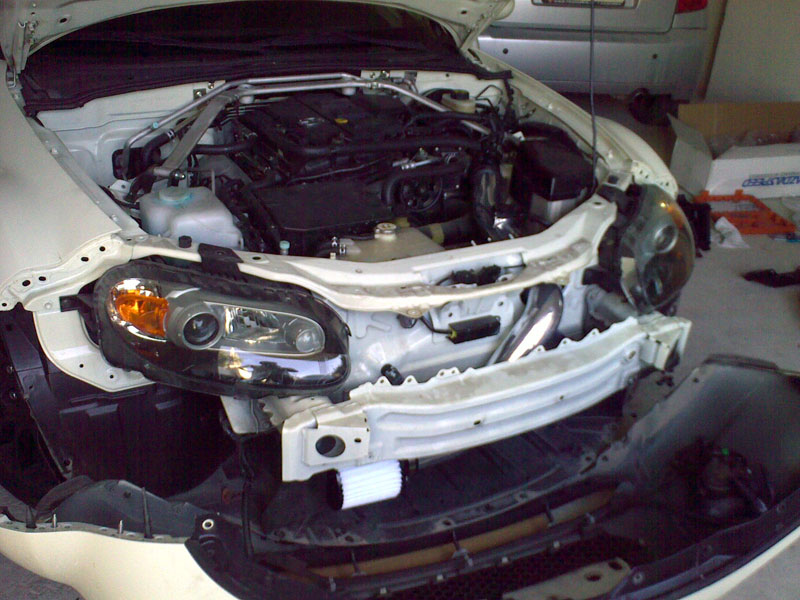
8. Install the two rubber mounts into the front of the chassis where the steel bumper support was removed. Use the supplied washers and 6mm nuts to secure .
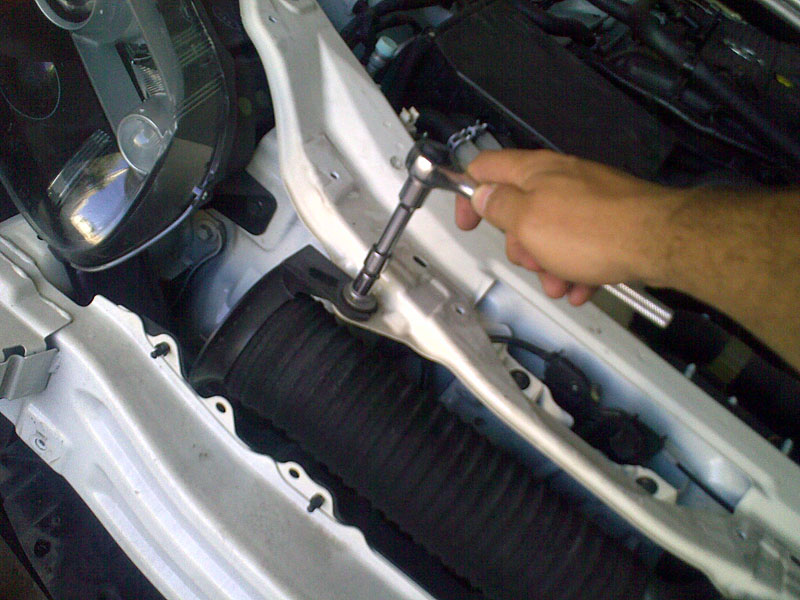
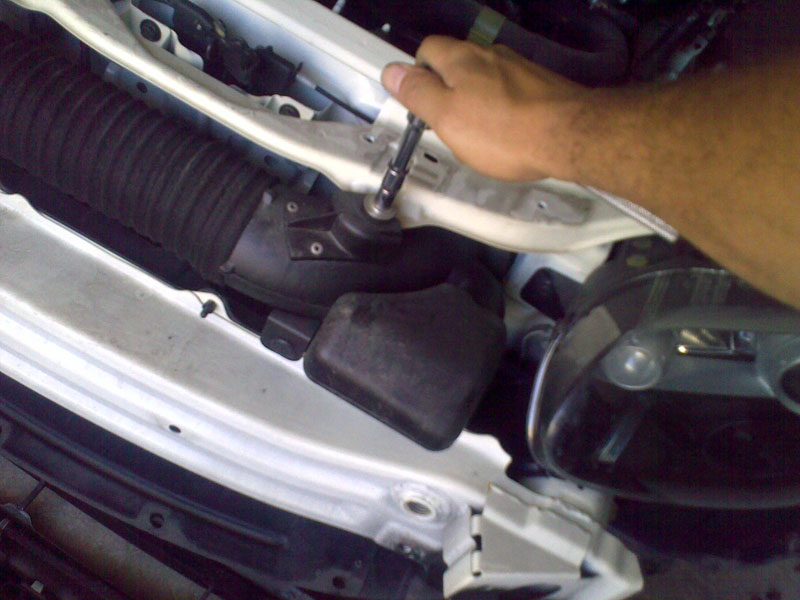
10. Install the supplied rubber mounts into the holes where the pipe brackets align. Secure the pipe brackets to the rubber mounts using the supplied washers and 6mm nuts. Torque the nuts to 23-30 in-lbs (2.5-3.4 N-m).
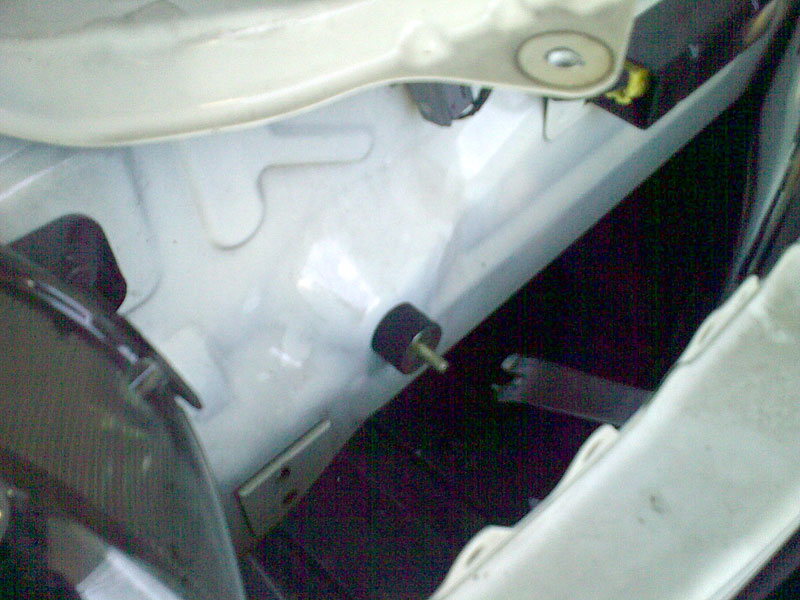
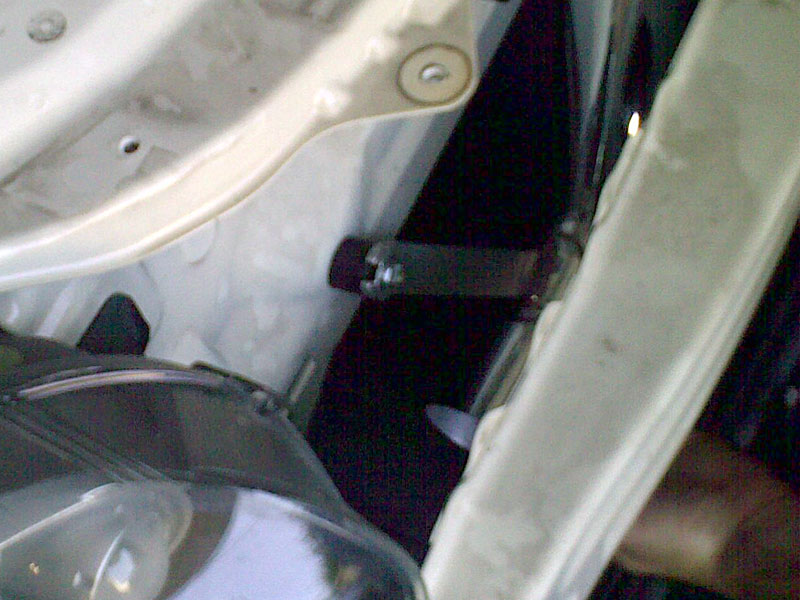
Για να μπουν τα δύο αυτά στηρίγματα (στη φωτό βλέπετε μόνο το ένα – πλευρά συνοδηγού), είναι λίγο μανίκι. Πρέπει να περάσει το χέρι από κάτω και πίσω από την μετώπη του αυτοκινήτου για να σφίξεις το παξιμάδι. Αν εκείνη την ώρα περάσει ο Άλκης από το γκαράζ σας για να πει ένα γεια, εκμεταλλευτείτε το! 
Και τελειώσαμε: